
Headlights on electric bikes are front-mounted lights that illuminate the rider’s path during low-light conditions, enhancing visibility and safety while riding in the dark.
Turning on the headlights on your electric bike is a simple process. Most electric bikes come equipped with a dedicated switch or button for the headlights. Locate this control on the handlebars or near the display panel. Once found, press or toggle the switch to activate the headlights.
To turn on the headlights on an electric bike, locate the control panel or switch on the handlebars. Once found, turn the switch to the “on” position, often marked with a headlight symbol. Some electric bikes may have automatic headlights that turn on when the bike is powered up. If you’re unsure, consult your bike’s user manual for specific instructions.
Electric Bike’s Lighting System
The electric bike’s lighting system plays a crucial role in enhancing safety and visibility during rides. Typically powered by the bike’s battery, the lighting system includes front and rear lights that illuminate the path ahead and make the bike visible to others on the road. LED lights are commonly used for their energy efficiency and brightness.
Some electric bikes also feature integrated brake lights that automatically illuminate when the brakes are applied, further signalling the rider’s intentions. The lighting system ensures that riders can confidently navigate in low-light conditions, promoting a secure and enjoyable riding experience.
Exploring The Components
Exploring the components involves discovering and understanding the different parts that make up a whole. Whether it’s a machine, a system, or even a concept, breaking it down into its essential components helps us comprehend how it functions.
It’s like investigating the pieces of a puzzle to see how they fit together to create a complete picture. By exploring components, we gain insights into their roles and interactions, enabling us to navigate and manipulate the larger structure more effectively.
Locating The Light Controls On Your Electric Bike
Locating the light controls on your electric bike is a breeze! Typically, the light controls are conveniently placed on the handlebars, near the grips. Look for a switch or button that is easily accessible while you’re riding. In most cases, pressing or toggling this control will activate your bike’s lights.
Some electric bikes may have multiple settings, allowing you to adjust the brightness or switch between different modes like steady light or flashing. If you’re unsure, refer to your bike’s user manual for specific instructions. Riding with lights not only enhances your visibility but also ensures a safer and more enjoyable experience, especially during low-light conditions. So, find that light control, and light up your ride.
Different Designs And Variations
| Design/Variation | Description |
| Cruiser | Classic design with wide handlebars and comfortable seat |
| Folding | Compact and foldable for easy storage and transportation |
| Mountain | Robust frame, knobby tires, ideal for off-road trails |
| Commuter | Lightweight, practical features, suitable for urban use |
| Electric | Powered by an electric motor, offers assisted pedaling |
| Hybrid | Blend of road and mountain bike features for versatility |
| Fixed Gear/Single Speed | Simple design with a fixed or single-speed drivetrain |
| Recumbent | Seated position with a reclined back for an ergonomic ride |
| Tandem | Designed for two riders, with two sets of pedals |
Activating The Headlights: Step-By-Step Guide
Locate the Control Switch:
- Find the control switch for the headlights on your electric bike. This is often situated near the handlebars for easy access.
Turn On the Power:
- Ensure that the main power of your electric bike is turned on. This is usually done using a separate switch or button, often located near the battery or display panel.
Identify the Headlight Symbol:
- Look for a symbol that represents headlights on the control panel. It might be an icon of a bulb or simply the word “light.” Press or toggle the switch associated with this symbol.
Adjust the Settings (If Needed):
- Some electric bikes come with adjustable settings for headlights, allowing you to control the brightness or choose different modes. If applicable, adjust the settings according to your preference.
Verify Headlight Activation:
- Finally, confirm that the headlights are working by checking for illumination. You may need to test them in low-light conditions to ensure they are providing adequate visibility.
Ensuring Safety: Pre-Ride Checks For Headlights
Ensuring safety on your electric bike begins with a few simple pre-ride checks for your headlights. Start by confirming that the main power switch is turned on, usually located near the battery or display panel. Next, locate the control switch for the headlights, often positioned conveniently near the handlebars.
Check for any visible damage to the lights or wiring. If your electric bike has adjustable settings, take a moment to set the brightness or choose the appropriate mode. Turn on the headlights and, if possible, verify their functionality in low-light conditions. Making these quick checks ensures that your headlights are ready to illuminate your path, enhancing your visibility and overall safety during your ride.
Adjusting Light Settings For Optimal Visibility
Achieving optimal visibility while riding your electric bike is easy with a few simple adjustments to the light settings. Begin by locating the light controls on your bike, usually found near the handlebars or on the control panel.
Once identified, check if your bike offers adjustable settings for brightness or different lighting modes. If so, experiment with these settings to find what works best for your riding conditions. Increasing brightness in low-light situations or selecting a flashing mode for added visibility in traffic are common adjustments.
Brightness Levels And Beam Angles
Brightness levels and beam angles are essential aspects when considering lighting options.
Brightness Levels: Brightness, often measured in lumens, indicates the amount of light emitted by a source. Higher lumens generally mean brighter light. When choosing lighting for different spaces, it’s crucial to match the brightness to the intended use. For example, task-oriented areas like kitchens may require higher brightness, while ambient spaces like bedrooms may benefit from softer illumination.
Beam Angles: The beam angle refers to the spread of light from a light source. It’s crucial in determining how wide or narrow the coverage of light will be. A narrow beam angle concentrates light in a specific area, making it ideal for spotlighting or accent lighting. On the other hand, a wide beam angle provides more extensive coverage, suitable for general or ambient lighting.
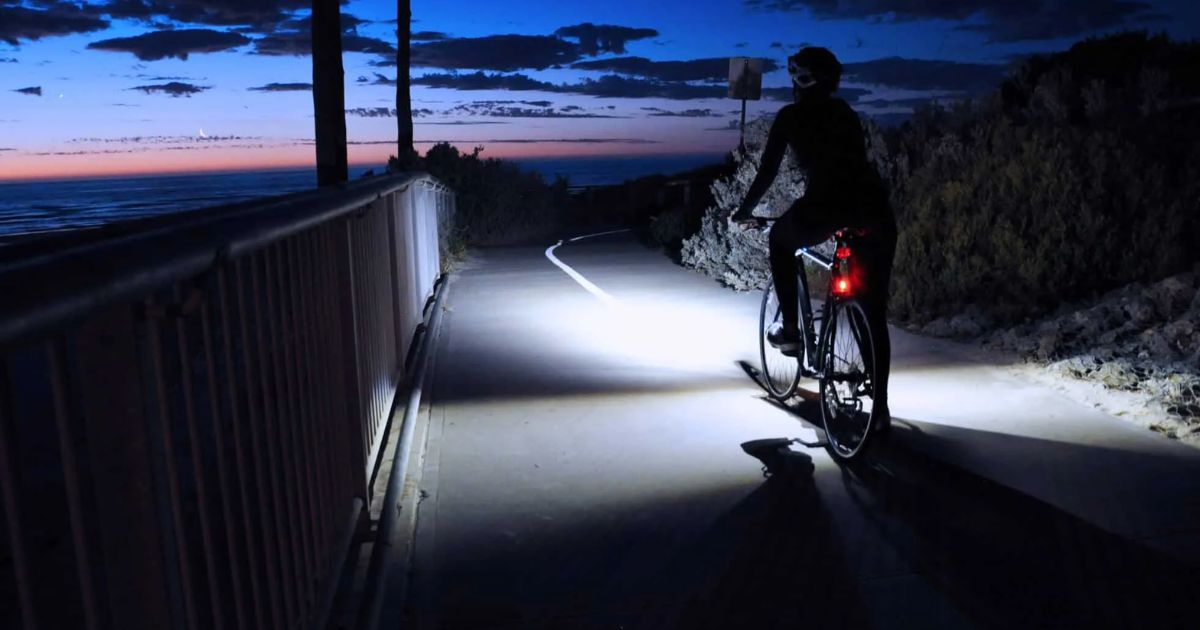
Tips For Riding With Electric Bike Headlights At Night
- Turn Them On: Ensure your electric bike headlights are turned on before riding at night. This helps you see the road ahead and makes you more visible to others.
- Check for Brightness: Confirm that the headlights are bright enough for night riding. Adjust the settings if your e-bike has adjustable brightness to match the surrounding light conditions.
- Angle Adjustment: Tilt the headlights slightly downward to illuminate the road without blinding oncoming traffic. This helps maintain visibility while being considerate to fellow road users.
- Charge Regularly: Keep your e-bike’s battery charged, especially if the headlights are powered by the same battery. A well-charged battery ensures your lights won’t dim unexpectedly during your night ride.
- Carry a Backup: Consider carrying a small, portable flashlight as a backup in case your e-bike headlights malfunction. It can be a handy tool to navigate in case of unexpected issues with your bike lights.
Frequently Asked Questions
Do all electric bikes have built-in headlights?
Not all electric bikes come with built-in headlights. Some models may require you to install aftermarket lights. If your electric bike has integrated lights, the controls are typically found on the handlebars or near the display panel.
Can I use any type of headlight for my electric bike?
Some electric bikes allow various headlight types, so it’s advisable to use lights specifically designed for bicycles. Look for LED lights with good visibility and a beam pattern suitable for cycling. Make sure they are compatible with your bike’s electrical system.
Why won’t my electric bike headlights turn on?
If your electric bike headlights are not turning on, check the battery level of your bike. Some bikes may disable non-essential functions, including lights, when the battery is low. Additionally, inspect the wiring and connections for any issues. If problems persist, consult your bike’s manual or contact the manufacturer.
Conclusion
Turning on the headlights on an electric bike is a straightforward process. Usually, electric bikes come equipped with a control panel or handlebar-mounted switch that allows riders to easily activate the headlights. It’s essential to familiarize yourself with your specific electric bike model’s user manual to locate the headlight control.
Once identified, a simple press of the button or switch should illuminate the headlights, enhancing visibility and safety, especially during low-light conditions or nighttime rides. Always remember to check and ensure that your bike’s headlights are functioning properly before embarking on any journey in dimly lit environments.

I’m passionate electric scooter enthusiast and the voice behind this blog. I’m here to share my expertise and insights with you. From in-depth reviews to problem-solving guides, my goal is to help you make the most of your electric scooter experience.


![Gomyfinance.com Invest: I Made $5,000 in My First Month [Real Results 2025]](https://electopolo.com/wp-content/uploads/2025/05/Gomyfinance.com-Invest-I-Made-5000-in-My-First-Month-Real-Results-2025-150x150.jpg)