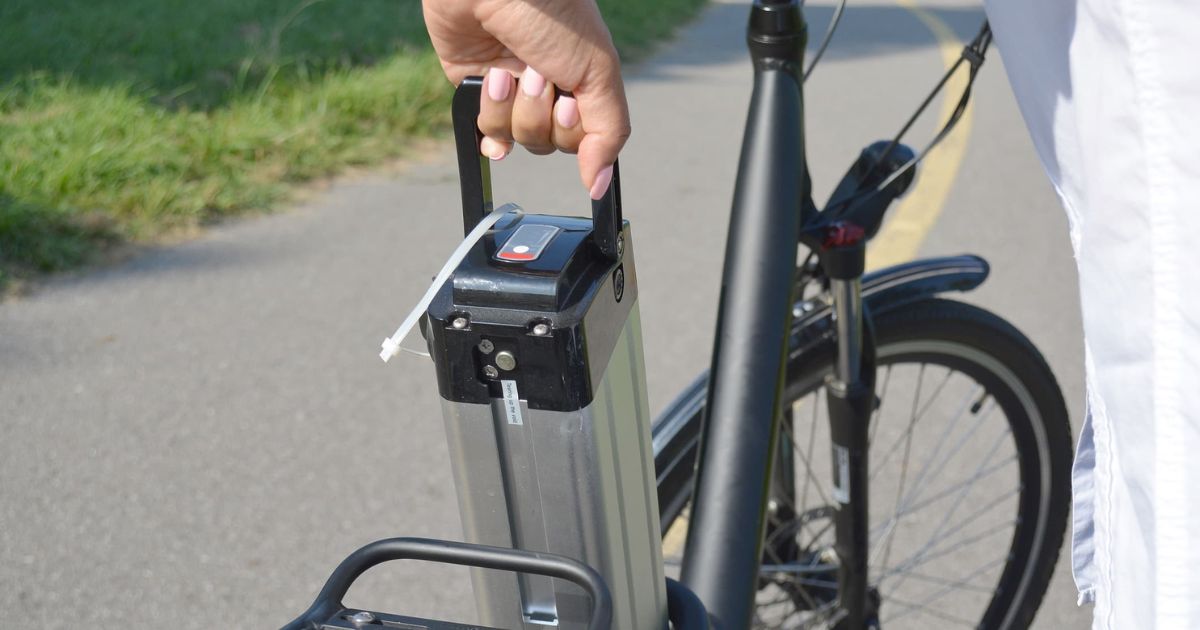
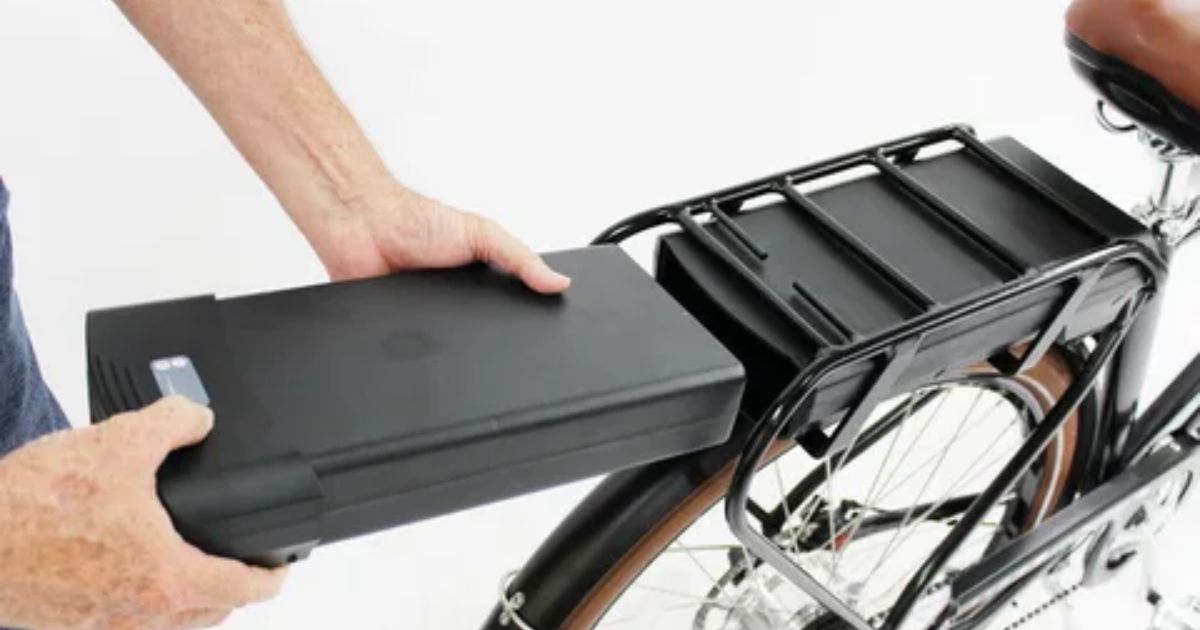
Removing the battery from an electric bike involves safely disconnecting and detaching the power source for maintenance or charging purposes.
Unlock the secret to liberating your electric bike’s power source with ease! Taking the battery off your electric bike is simpler than you think. No need to be an expert – just follow a few straightforward steps, and you’ll have the key to unplugging and upgrading in no time.
To remove the battery from an electric bike, first, locate the battery compartment, typically positioned on the frame. Next, ensure the bike is powered off to prevent any electrical mishaps. Depending on the model, release the battery using a key or latch mechanism, then gently slide or lift the battery out.
Safety Precautions
Power Off: Turn off the electric bike to prevent any electrical accidents. Ensure that the power switch is in the off position before proceeding.
Protective Gear: Wear gloves and safety glasses to shield yourself from potential hazards. This simple gear can provide essential protection during the battery removal process.
Follow Instructions: Refer to the bike’s manual or manufacturer’s guidelines for specific instructions on removing the battery. Look for any locks or latches that need to be disengaged.
Gentle Disconnect: Carefully disconnect the battery, paying attention to any attached cables. Using both hands, gently handle the battery to maintain control and minimize the risk of dropping it.
Proper Storage: Once removed, store the battery in a cool, dry place away from direct sunlight and extreme temperatures. This helps maintain the battery’s condition and ensures its safety during storage.
Ensuring A Secure Environment For Battery Removal
Ensuring a secure environment for battery removal is crucial for both personal safety and environmental protection. When removing batteries from devices, it is important to follow proper guidelines to prevent potential hazards.
Start by ensuring the device is turned off to minimize the risk of electrical shock. If possible, use insulated gloves to protect yourself from any residual electrical charge. Dispose of old or damaged batteries in designated recycling bins to prevent environmental contamination.
Power Down The Electric Bike
To power down an electric bike, follow these simple steps. First, locate the power button on the bike’s control panel or battery pack. Press and hold the power button until the display or indicator lights turn off. Some electric bikes may have a specific sequence, like pressing the button twice or holding it for a few seconds.
Once the bike is powered down, you can safely disconnect the battery if needed. Always consult your bike’s manual for specific instructions, as different models may have slight variations in the power-down process. Turn off the bike when not in use to conserve battery life and ensure safe storage.
Step-By-Step Guide To Safely Turn Off And Disconnect Power
Locate the Power Button: Identify the power button on your device, often found on the control panel or battery pack. It is usually marked with a symbol like a power icon.
Press and Hold: Press and hold the power button until you see the display or indicator lights turn off. Some devices may require a specific duration of holding, so check your user manual for guidance.
Observe the Shutdown Process: Pay attention to any on-screen prompts or indicator lights that signal the shutdown process. Some devices may have a sequence or specific actions needed for a safe shutdown.
Wait for Confirmation: Allow a moment for the device to fully power down before proceeding. This ensures that all systems have safely shut off.
Disconnect Power Source (If Necessary): If your device has a removable battery or power source, follow the manufacturer’s instructions to safely disconnect it. This step is crucial for maintenance, storage, or charging purposes.
Locating The Battery Compartment
Locating the battery compartment is a simple task that varies depending on the device you’re using. Most electronic devices have a designated area where the batteries are housed. Look for a panel or cover on the back or bottom of the device that can be easily opened.
In many cases, there may be a small symbol indicating the battery compartment. Once you find the compartment, open it using the designated method, which might involve sliding, pressing, or unscrewing. Inside, you’ll typically find labelled markings indicating the correct orientation for inserting the batteries.
Disconnecting The Wiring
Disconnecting the wiring is a simple yet crucial process in various situations, such as fixing electronic devices or performing maintenance on appliances. This involves safely separating the electrical connections that power these devices. Before starting, it’s essential to turn off the power source to avoid any electrical shocks.
Once the power is off, carefully identify and unplug the connectors, ensuring a secure disconnection. This step is vital for repairs, upgrades, or when replacing components. Always follow safety guidelines and, if needed, consult manuals or seek professional advice to ensure a smooth and hazard-free disconnection process.
Proper Techniques for Safely Detaching Electrical Connections
When it comes to safely detaching electrical connections, it’s crucial to follow proper techniques to avoid accidents and ensure personal safety. Start by turning off the power source to the electrical device or circuit to eliminate the risk of electric shock.
Use insulated tools, such as pliers or screwdrivers with rubberized handles, to avoid direct contact with live wires. Gently and firmly grip the connector, avoiding excessive force that may damage the components. If possible, wear insulated gloves to provide an additional layer of protection.
Removing Mounting Hardware
Removing mounting hardware is a simple process that involves taking apart the components used to secure an object in place. It’s a shelf, picture frame, or electronic device, the first step is to identify the screws, bolts, or brackets holding it in position.
Using the appropriate tools, such as a screwdriver or wrench, carefully loosen and remove each piece of hardware. Pay attention to any specific instructions provided by the manufacturer. Once all the mounting hardware is detached, the object can be easily lifted or moved.
Step-By-Step Instructions On Unfastening The Battery From The Bike Frame
Locate the Battery Mount: Begin by identifying the battery mount on the bike frame. The battery is typically secured in a specific compartment or attached to the frame using a mount designed for that purpose.
Use the Correct Tools: Choose the appropriate tools, usually a wrench or Allen key, to unfasten the bolts or screws holding the battery in place. Ensure that you have a tool that fits securely to avoid stripping or damaging the hardware.
Loosen and Remove the Fasteners: Gently loosen and remove the fasteners that secure the battery to the bike frame. Turn the bolts or screws counterclockwise until they are fully detached. Keep track of the fasteners, as you’ll need them when reattaching the battery.
Carefully Detach the Battery: Once all the fasteners are removed, carefully detach the battery from the bike frame. Be mindful of any additional connectors or wires, and disconnect them according to the manufacturer’s instructions.
Frequently Asked Questions
Can I remove the battery while the electric bike is turned on?
No, it’s not recommended to remove the battery while the electric bike is turned on. Always power off the bike before attempting to take off the battery to prevent any electrical issues or damage.
Do I need any special tools to remove the battery from my electric bike?
In most cases, no special tools are required. Manufacturers typically design electric bikes with user-friendly battery removal mechanisms. However, it’s a good idea to check your bike’s manual to see if any specific tools or procedures are recommended.
How often should I remove the battery from my electric bike?
It’s not necessary to frequently remove the battery from your electric bike. Generally, you may only need to do so when charging or if you plan to store the bike for an extended period. Follow the manufacturer’s guidelines for battery maintenance and storage.
Conclusion
Removing the battery from an electric bike is a straightforward process that requires a few simple steps. Begin by locating the battery, usually positioned on the frame or within a dedicated compartment. Ensure the bike is powered off before proceeding.
Depending on the bike model, use the designated key or release mechanism to unlock and detach the battery. Exercise caution and follow manufacturer guidelines to avoid damage or injury. Taking off the battery is essential for charging, maintenance, or when storing the bike for an extended period.

I’m passionate electric scooter enthusiast and the voice behind this blog. I’m here to share my expertise and insights with you. From in-depth reviews to problem-solving guides, my goal is to help you make the most of your electric scooter experience.


![Gomyfinance.com Invest: I Made $5,000 in My First Month [Real Results 2025]](https://electopolo.com/wp-content/uploads/2025/05/Gomyfinance.com-Invest-I-Made-5000-in-My-First-Month-Real-Results-2025-150x150.jpg)


