Are you interested in building an electric bike but worried about the cost? Don’t let that stop you! You might think that building an electric bike would be expensive, but I’m here to show you that it’s possible to do it for less than $100. Yes, you heard that right – with a little bit of know-how and some resourcefulness, you can have your very own electric bike without breaking the bank.
In this guide, we’ll walk you through the steps to build an electric bike on a budget, providing you with the tools, materials, and instructions you need. So, let’s get started and make your dream of owning an electric bike a reality!
Key Takeaways
- Electric bikes convert electrical energy into mechanical energy to assist with pedaling.
- Components include a motor, battery, controller, and throttle.
- Understanding these components is essential for building an electric bike.
- The motor provides power to assist with pedaling.
Background and Theory
To understand the principles behind building an electric bike for less than $100, you need a solid grasp of the underlying background and theory. Electric bikes operate on the basic principle of converting electrical energy into mechanical energy to assist with pedaling.
This is achieved through the use of a motor, battery, controller, and throttle. By understanding these components and how they work together, you’ll be better prepared to move on to the next step: gathering the necessary tools and materials.
Tools and Materials
You’ll need to gather the necessary tools and materials to build your electric bike for less than $100. Here’s what you’ll need:
- A bicycle frame: Look for a used bike frame in good condition, as this will be the foundation of your electric bike.
- Electric motor: Choose a small and efficient electric motor that suits your needs and budget.
- Batteries: Opt for lightweight lithium-ion batteries that can provide enough power for your electric bike.
- Control system: Invest in a reliable control system that allows you to regulate the speed and assist level of your electric bike.
Now that you know what tools and materials you need, let’s move on to obtaining them.
Obtaining the Materials
First, gather the necessary materials for building your electric bike for less than $100. You will need a bicycle frame, a motor, a battery, a controller, throttle, and a few basic tools such as wrenches and screwdrivers. The bicycle frame can be purchased secondhand or found at a local bike shop.
The motor, battery, controller, and throttle can be obtained from online marketplaces or specialty stores. Once you have gathered all the materials, you can move on to machining the bearing cups for your electric bike.
Machining the Bearing Cups
Once you have gathered all the necessary materials, it is time to begin machining the bearing cups for your electric bike. To ensure a successful outcome, follow these steps:
- Set up your lathe machine with the appropriate cutting tools and secure the bearing cup in place.
- Use precise measurements to determine the desired dimensions for your bearing cups.
- Start the machining process by carefully removing excess material from the cup, ensuring a smooth and even surface.
- Continuously check your progress with calipers to maintain accuracy and achieve the desired fit.
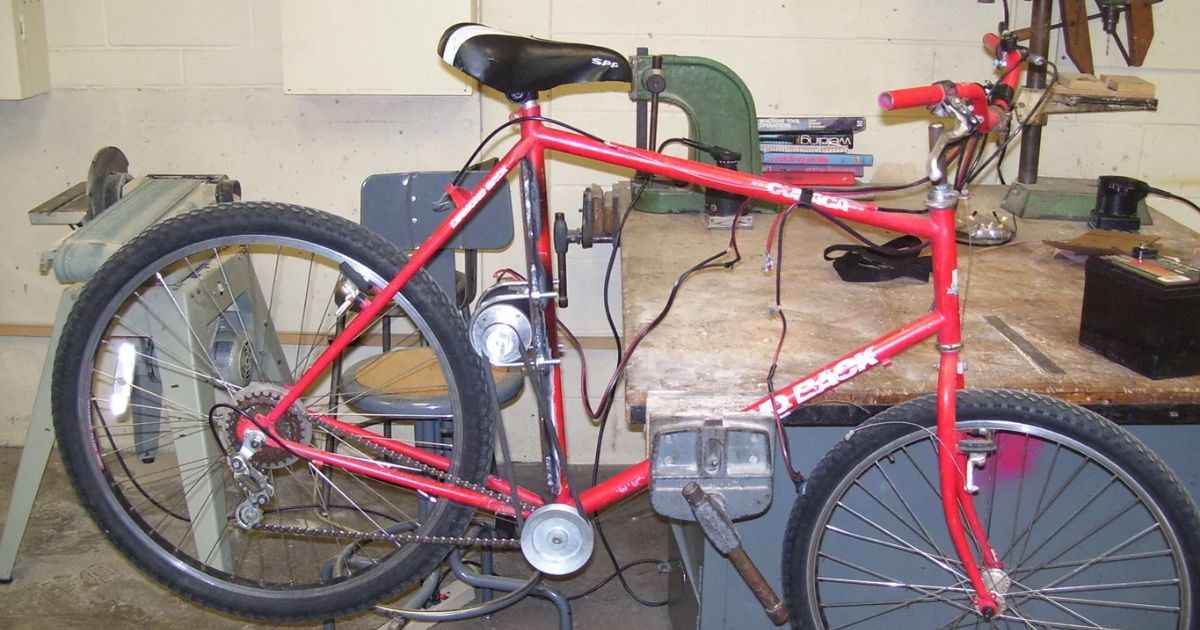
Machining the Jackshaft
To begin machining the jackshaft for your electric bike, gather the necessary tools and carefully secure the jackshaft in place. Start by marking the desired length on the jackshaft using a ruler or measuring tape. Use a hacksaw or bandsaw to cut the jackshaft to the desired length, ensuring a clean and straight cut.
Next, use a metal file to smooth the edges and remove any burrs. Finally, use a drill press to create any necessary holes or slots on the jackshaft for mounting various components.
Modifying the Sprocket
To begin modifying the sprocket, you’ll need to secure it in place and gather the necessary tools. Follow these steps to successfully modify the sprocket for your electric bike:
- Use a wrench to remove the bolts securing the sprocket to the hub.
- Carefully inspect the sprocket for any signs of wear or damage.
- Use a file or grinder to smooth any rough edges on the sprocket teeth.
- Consider adding teeth to the sprocket to increase its efficiency and power output.
Main Drive Pulley
After modifying the sprocket, you can now move on to the next step in building your electric bike for less than $100: the main drive pulley. The main drive pulley is an essential component that connects the motor to the rear wheel of your bike, allowing it to propel forward.
To ensure a smooth and efficient operation, it is important to choose the right size and material for your main drive pulley. See the table below for some options:
| Material | Size (inches) | Teeth |
|---|---|---|
| Aluminum | 3 | 18 |
| Steel | 4 | 28 |
| Nylon | 2.5 | 16 |
| PVC | 3.5 | 20 |
| Carbon | 3.2 | 19 |
Select a main drive pulley that matches the specifications of your electric bike and ensures optimal performance. Once you have chosen the right pulley, you can proceed to the next step: the jackshaft assembly, which will further enhance the efficiency of your electric bike.
Jackshaft Assembly
You will need a few components to assemble the jackshaft for your electric bike. Here’s what you’ll need:
- Jackshaft bracket: This sturdy bracket will provide support and stability for your jackshaft, ensuring smooth operation.
- Jackshaft sprocket: This gear will connect to the chain on your electric bike, allowing power to be transferred from the motor to the rear wheel.
- Bearings: These small but crucial components will allow the jackshaft to rotate smoothly, reducing friction and increasing efficiency.
- Bolts and washers: These fasteners will secure the jackshaft assembly in place, ensuring it stays in position during operation.
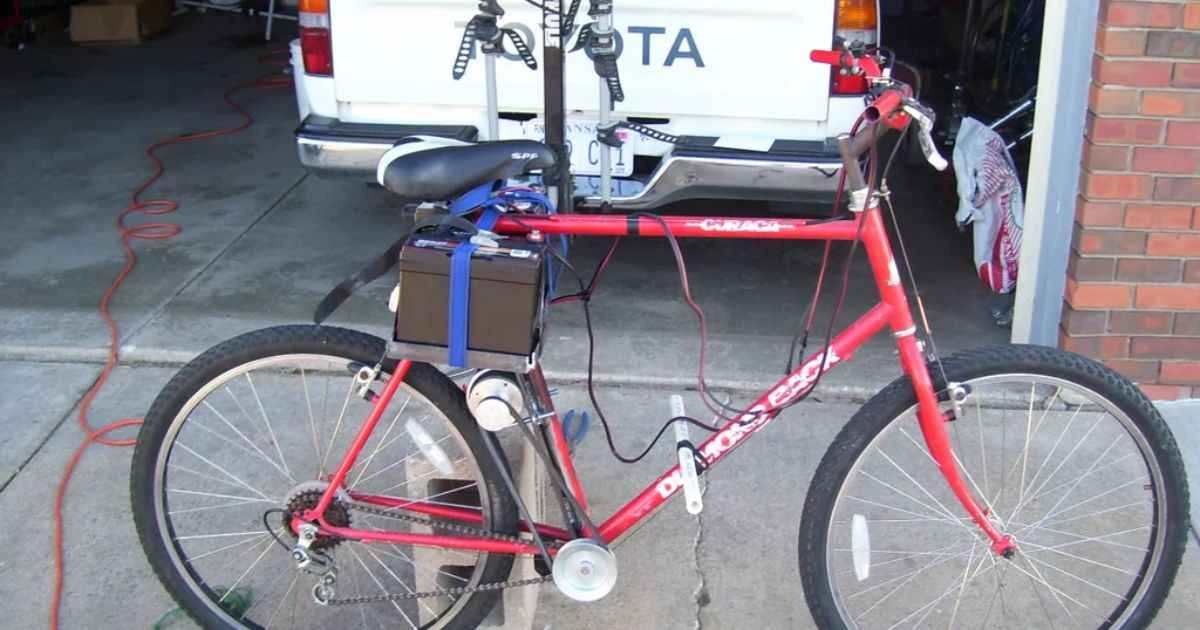
Chain Drive Assembly
Attach the chain to the jackshaft sprocket using a master link. Ensure that the chain is properly aligned with the sprocket teeth to ensure smooth operation. Next, connect the other end of the chain to the rear wheel sprocket.
Make sure the chain is tensioned correctly, neither too loose nor too tight. Adjust the position of the rear wheel to achieve the desired tension. Test the chain tension by turning the pedals and observing the movement of the chain.
First No Load Test
To perform the first no load test, start by ensuring that the chain is properly aligned and tensioned as discussed in the previous section. Once the chain is in place, follow these steps to conduct the test:
- Connect the motor to the battery and switch it on.
- Observe the movement of the chain and ensure it rotates smoothly.
- Check for any unusual noises or vibrations during operation.
- Monitor the motor’s performance and note any irregularities.
This test will help identify any initial issues with the electric bike and ensure a smooth and efficient ride.
Frequently Asked Questions
How Long Does It Take to Build an Electric Bike?
To build an electric bike, it takes time. The duration depends on your skill level, available resources, and the complexity of the bike. With dedication and proper planning, you can complete it in a few weeks or months.
Can I Use Any Type of Bike to Build an Electric Bike?
Yes, you can use any type of bike to build an electric bike. However, it’s important to consider factors such as frame strength and compatibility with the electric components. Choose a bike that suits your needs and budget.
What Is the Average Cost of the Additional Materials Needed?
To build an electric bike for less than $100, you’ll need additional materials. The average cost of these materials can vary, but it’s possible to find affordable options that won’t break the bank.
How Difficult Is It to Modify the Sprocket and Main Drive Pulley?
Modifying the sprocket and main drive pulley can be a bit challenging, but with the right tools and instructions, you can do it. Take your time, follow the steps, and you’ll successfully accomplish the task.
Are There Any Safety Precautions or Guidelines to Follow During the Assembly Process?
To ensure safety during assembly, you should wear protective gear like gloves and goggles. It’s also important to follow the manufacturer’s instructions and double-check all connections. Remember, safety first!
Conclusion
In conclusion, by following the steps outlined in this article, you can successfully build your own electric bike for under $100. With the right tools and materials, along with a bit of machining and assembly, you can create a cost-effective and efficient mode of transportation. So why wait? Get started on your DIY electric bike project and enjoy the thrill of riding your own creation through the streets.
I’m passionate electric scooter enthusiast and the voice behind this blog. I’m here to share my expertise and insights with you. From in-depth reviews to problem-solving guides, my goal is to help you make the most of your electric scooter experience.


![Gomyfinance.com Invest: I Made $5,000 in My First Month [Real Results 2025]](https://electopolo.com/wp-content/uploads/2025/05/Gomyfinance.com-Invest-I-Made-5000-in-My-First-Month-Real-Results-2025-150x150.jpg)